

Step 1 - Setup a Basic Gateway
Choose your Development Approach
Select how you'd like to build your gateway. You can switch between approaches at any time.
Portal Development
Build and deploy your gateway using Zuplo's web-based portal. No local setup required.
In this tutorial we'll set up a simple gateway. We'll use a simple origin API at getting-started.zuplo.io.
Note - Zuplo also supports building and running your API locally. To learn more see the documentation.
-
Sign-in
Sign in to the Zuplo Portal and create a free account. Then create a new empty project (don't import an existing project, we'll set up git later). Then...
-
Add your first Route
Inside your new project, select the Code tab (1), choose the
routes.oas.jsonfile (2) and click Add Route (3)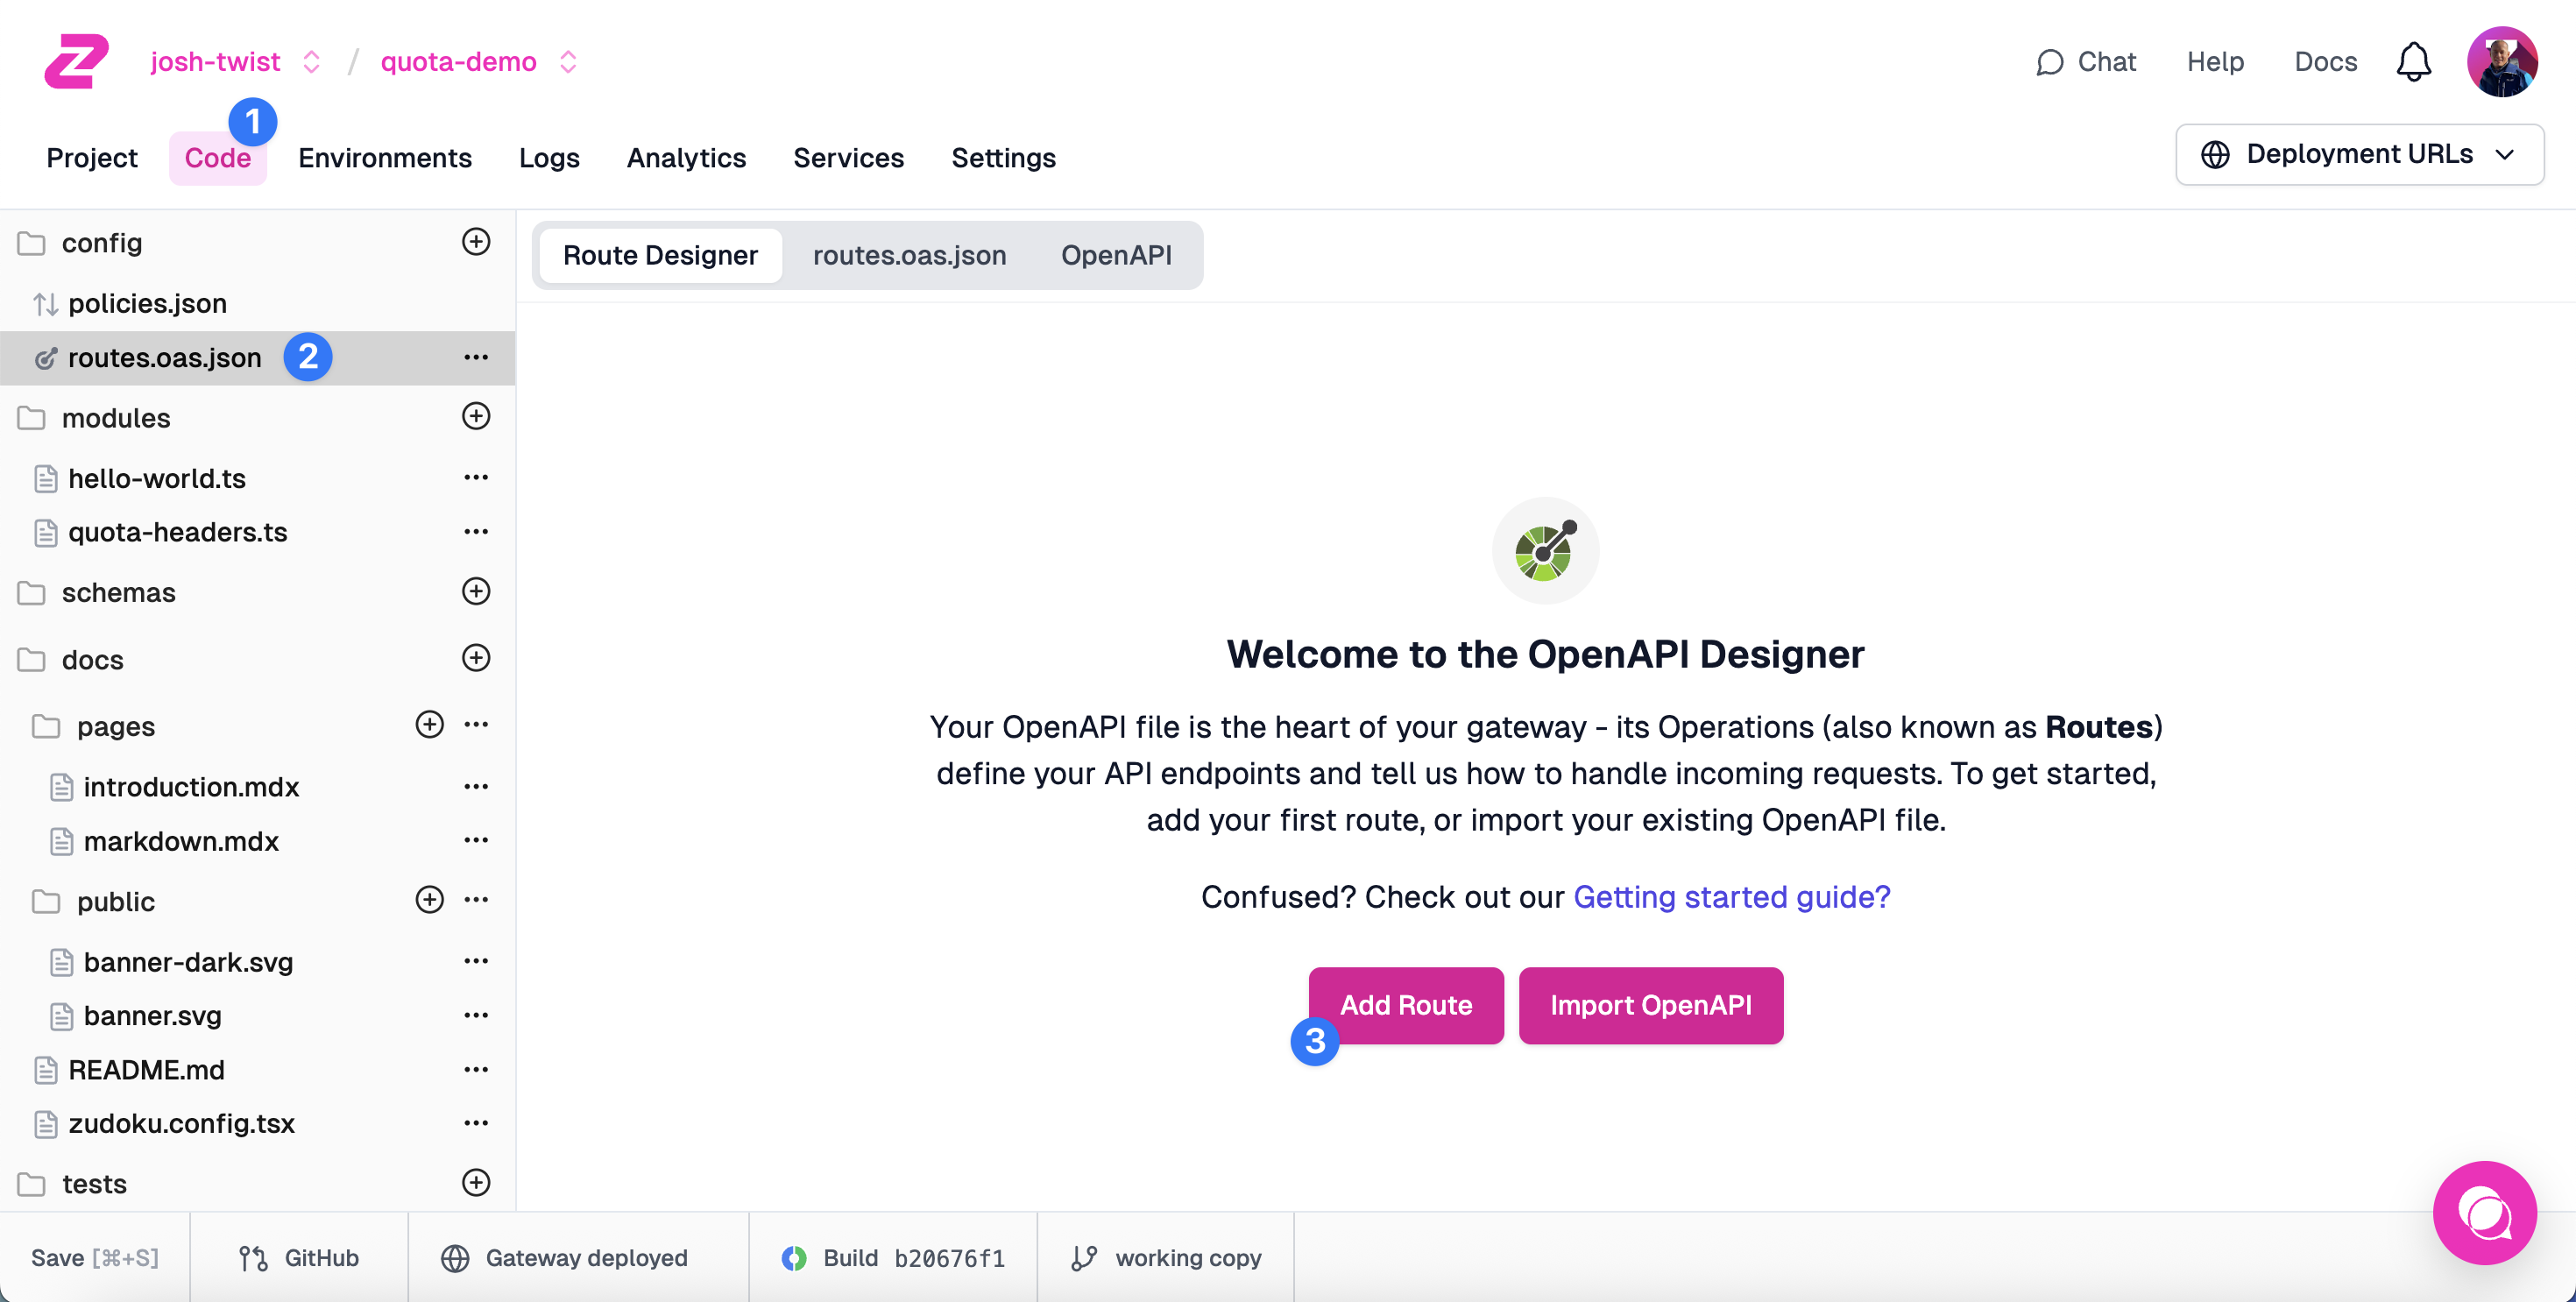
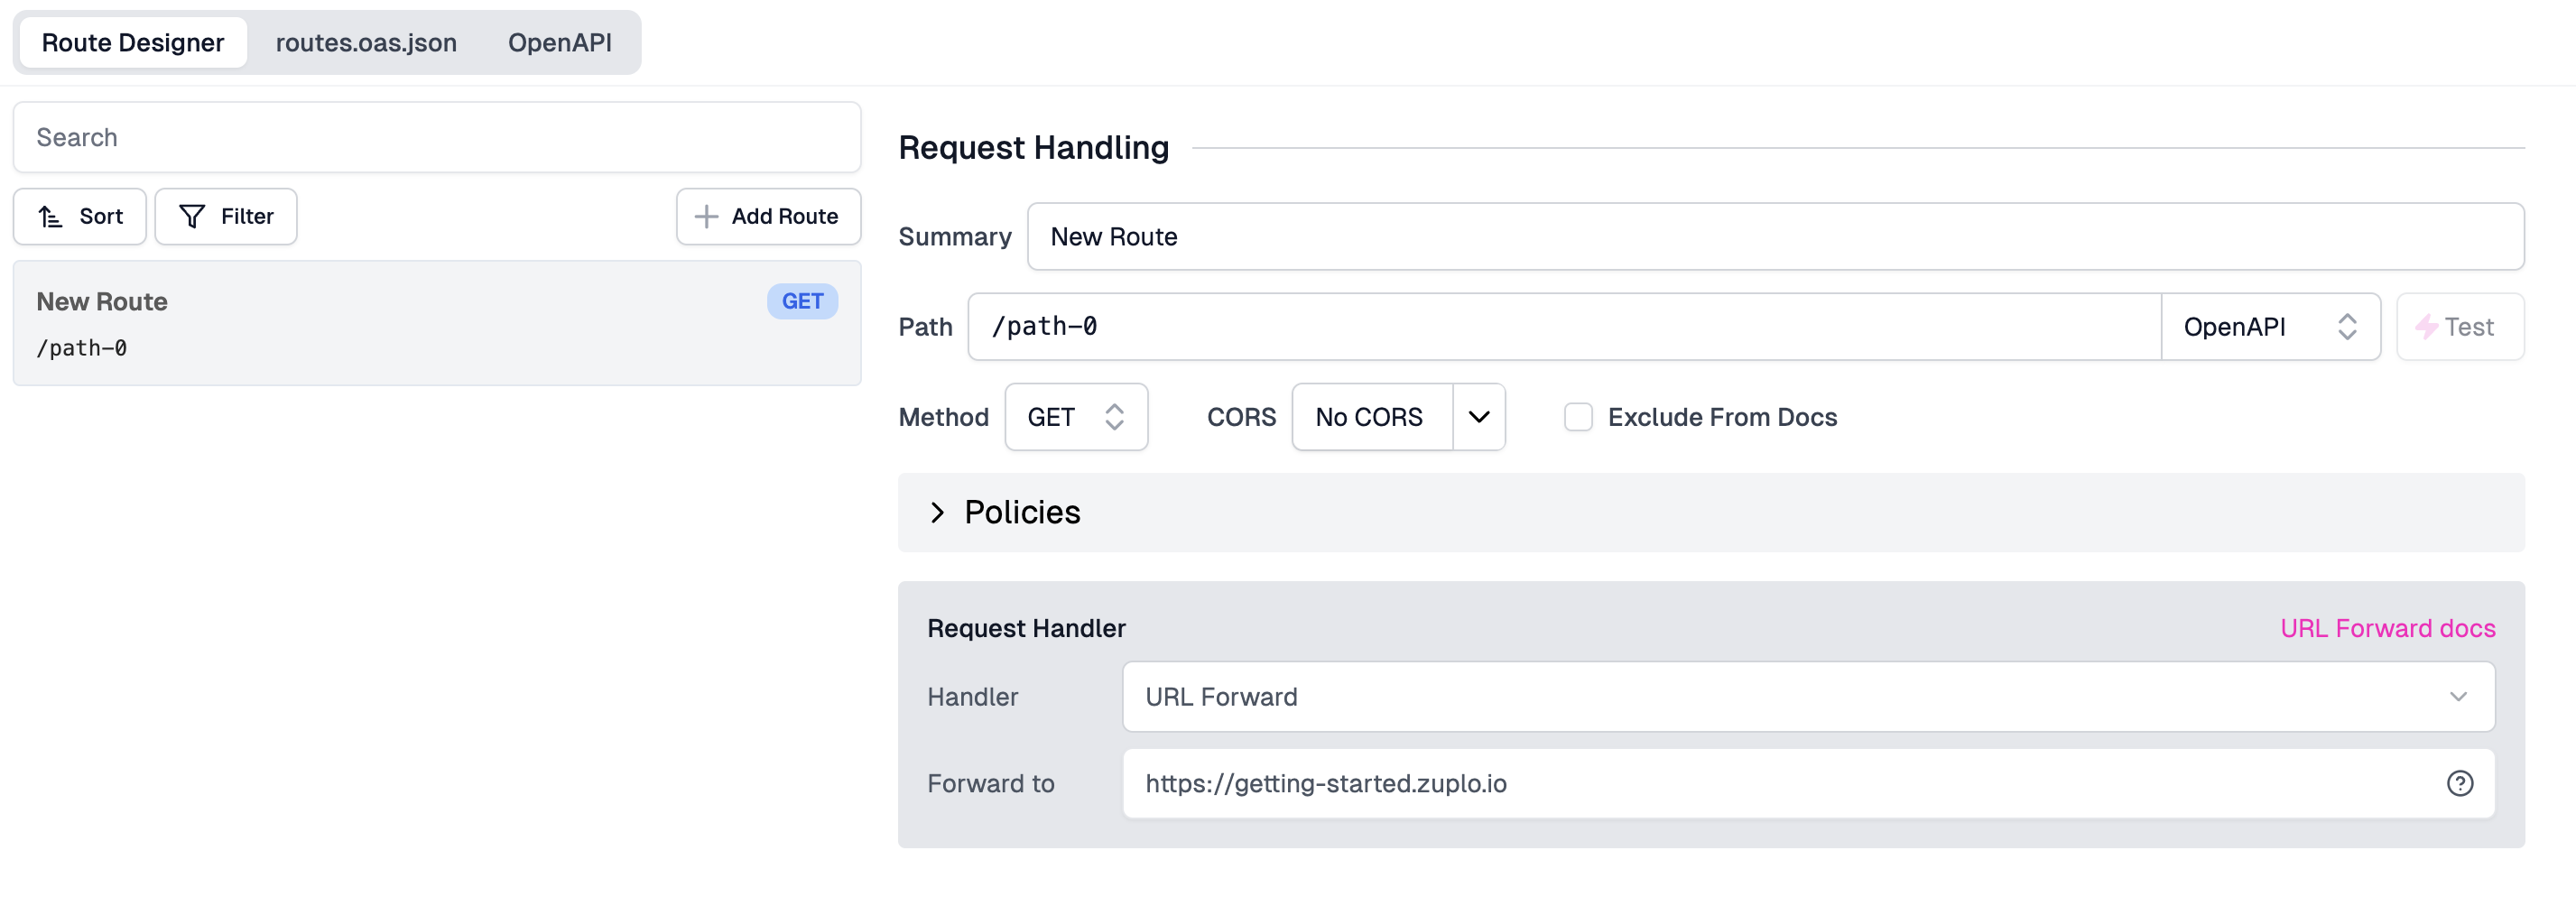
Your API's first route will appear, with many options. First we'll configure the route to match specific incoming requests to the gateway:
- Summary: Enter a summary, for example
Example Endpoint. - Method: Leave as
GET. - Path: Enter
path-0.
Then we'll specify how the route will invoke the backend origin API, using a forward handler:
- Request Handler: We'll use the
URL Forward Handler which proxies requests
by "Forwarding to" the same path on specified URL. In this case, enter
https://echo.zuplo.io
Save your changes - click Save at the bottom left, or press CMD+S
- Summary: Enter a summary, for example
-
Test your route.
You can quickly test this route by clicking the Test button next to the Path field. You can use the built in test tool or click the URL to open in a new tab.
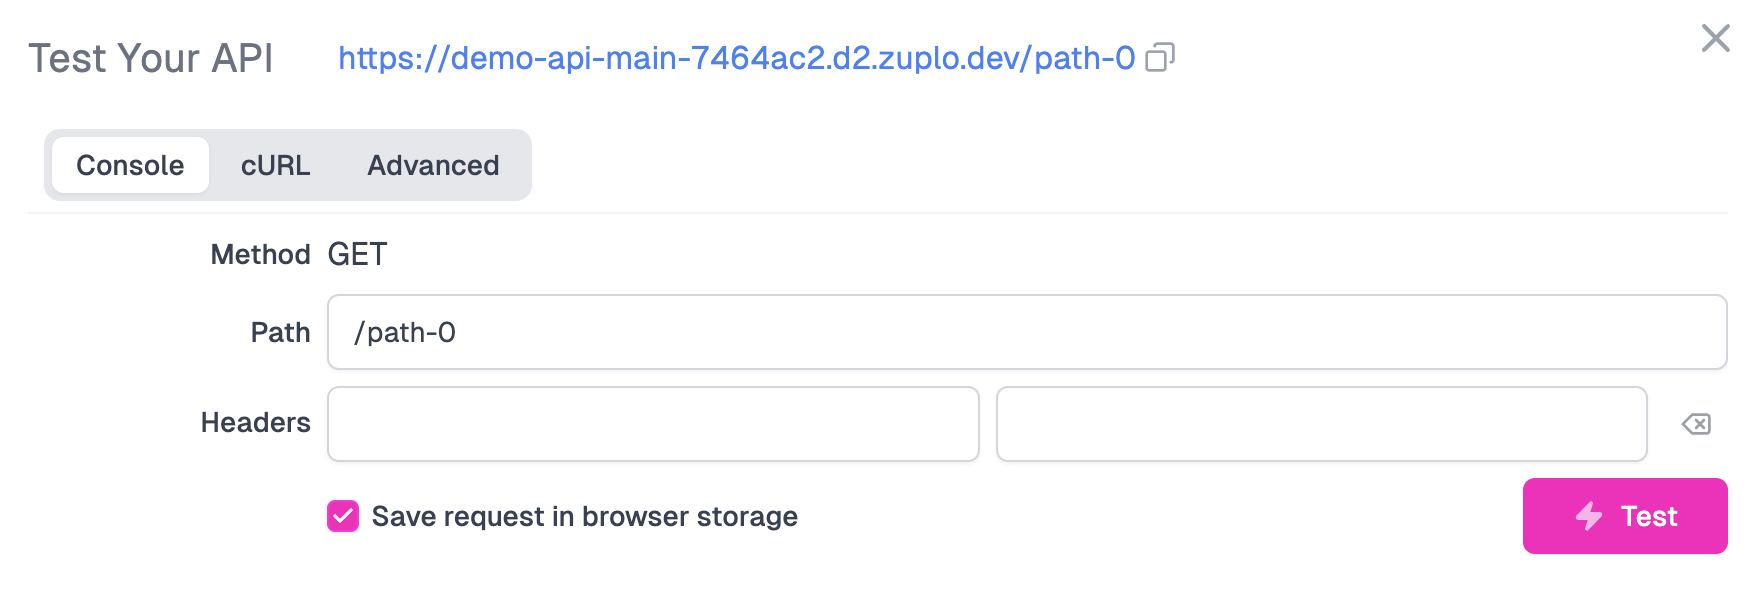
You should receive a 200 OK that says something similar to
CodeA secret? Let's try and find out what this API is hiding!
-
Put the base URL in an Environment Variable
When working with Zuplo, you'll eventually want each environment to use a different backend (for example QA, staging, preview, production etc).
Change the URL Forward value to read the base URL from the Environment Variables system by setting the value to
${env.BASE_URL}. We will set the value forBASE_URLnext.
Navigate to your project's Settings (1) via the navigation bar. Next, click Environment Variables (2) under Project Settings.
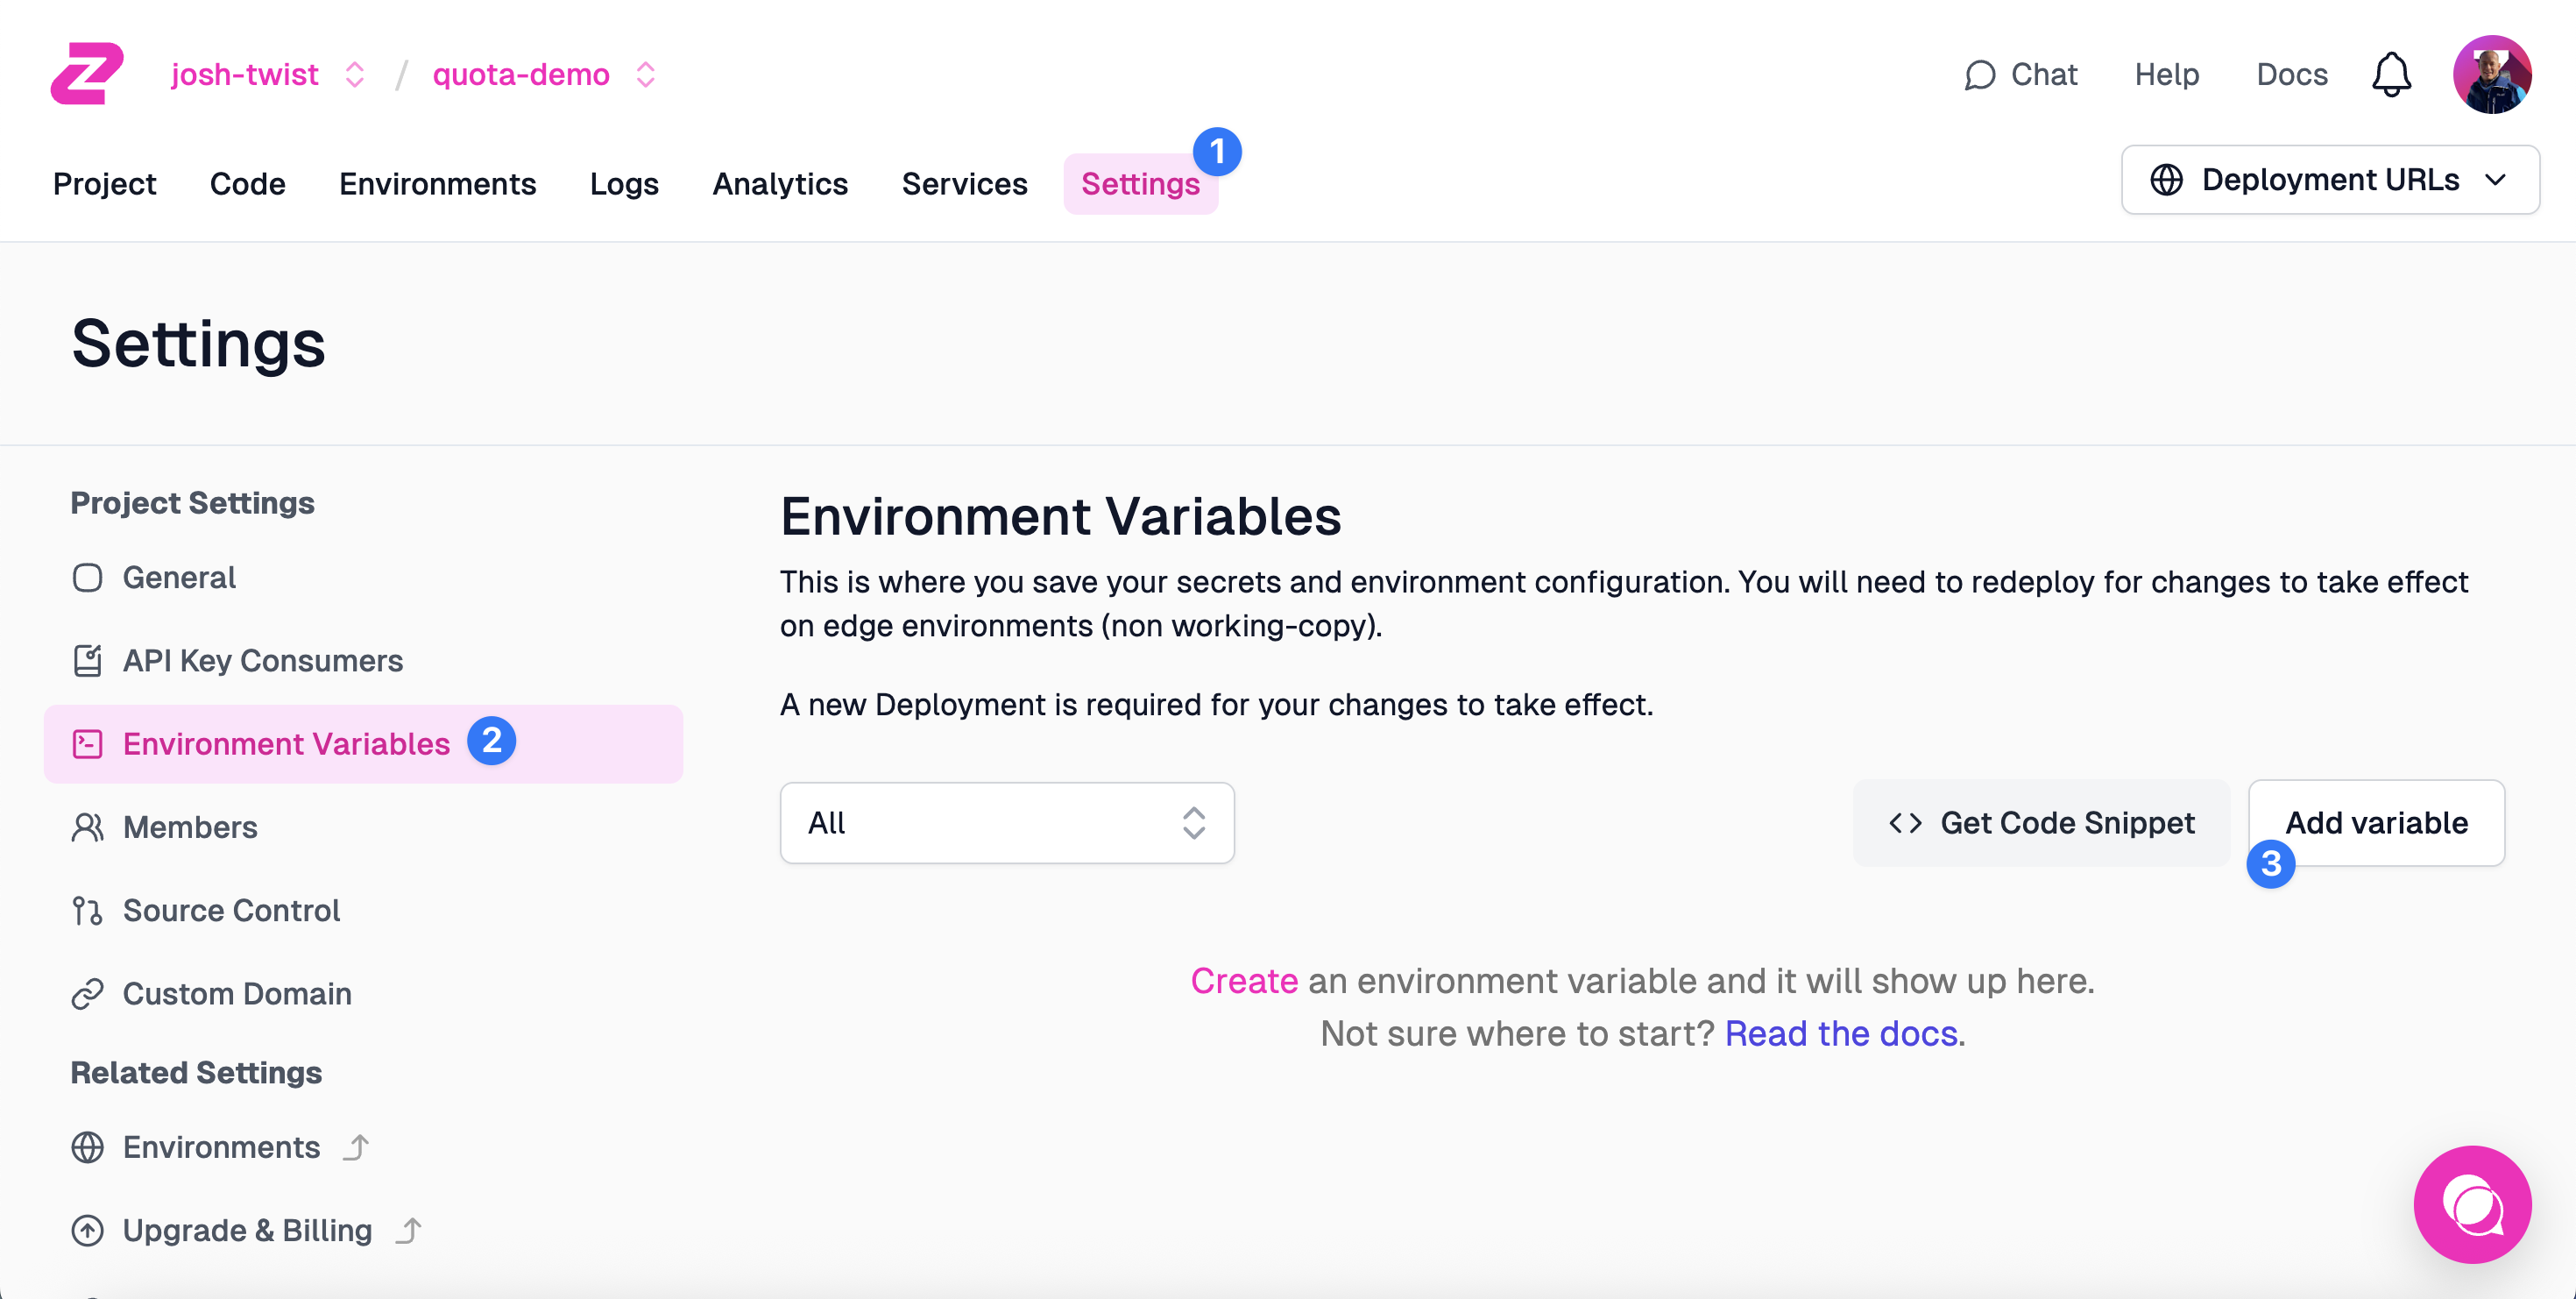
Add an Environment Variable (3) called
BASE_URL. Leave the "Secret" checkbox unchecked. This is typically not a secret, so there's no need to hide this from your colleagues.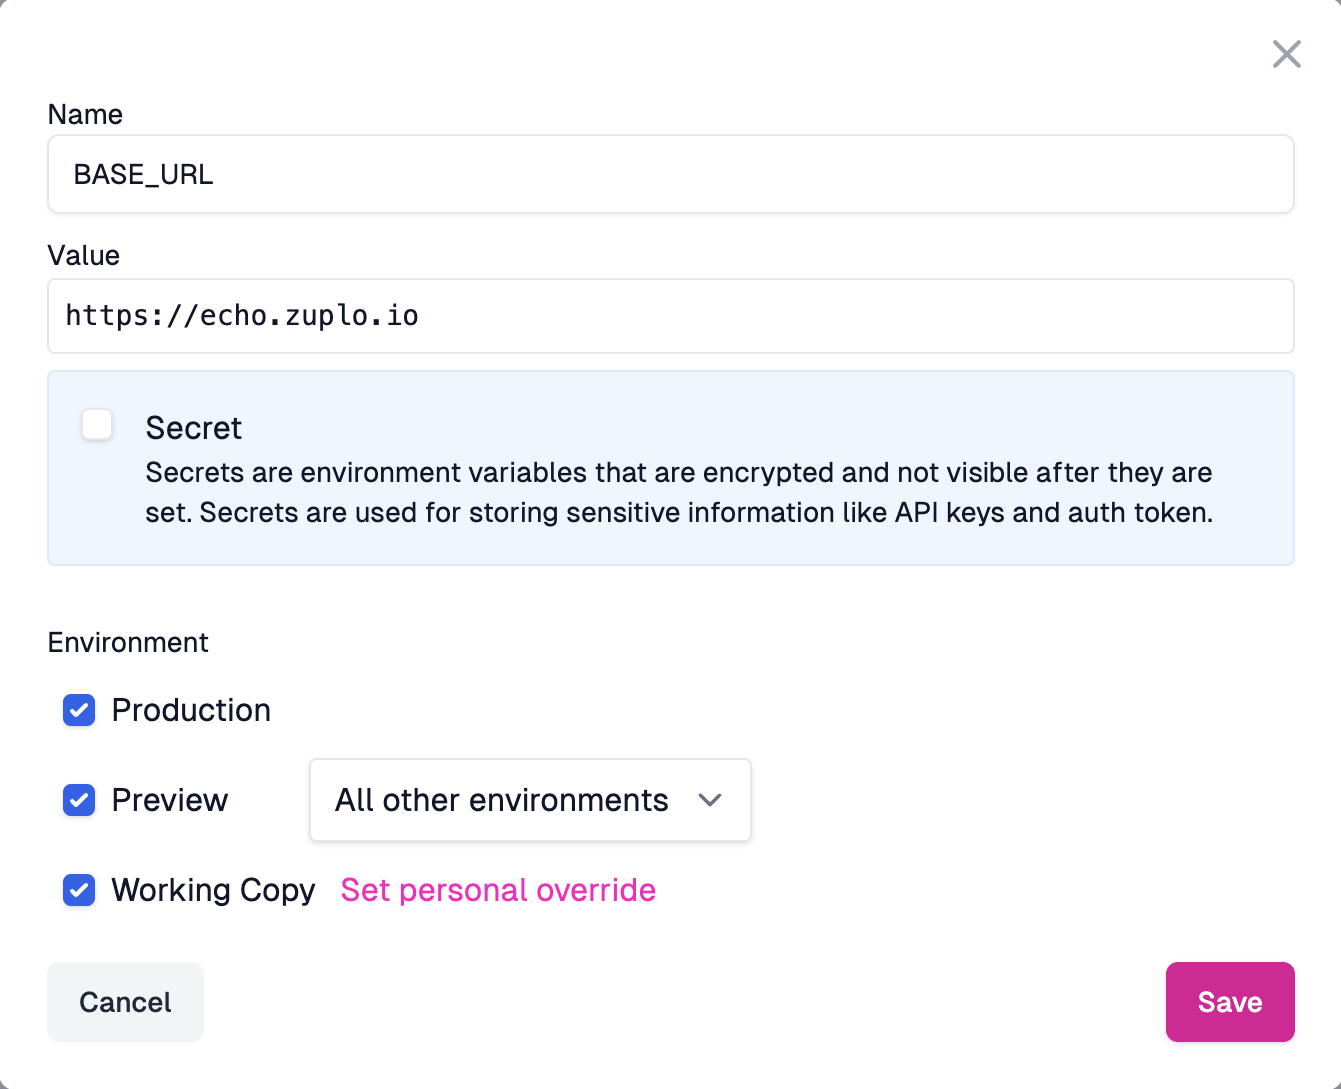
Save the environment variable, head back to the Code tab, click
routes.oas.json, and test your route again. You should get back the same response from Step 2.
NEXT Try Step 2 - Add Rate Limiting to your API.