

Step 2 - Add Rate Limiting
Choose your Development Approach
Select how you'd like to build your gateway. You can switch between approaches at any time.
Local Development
Develop and test your gateway locally using the Zuplo CLI. Full control over your environment.
In this guide we'll add simple Rate Limiting to a route. If you don't have one ready, complete Step 1 first.
Rate Limiting is one of our most popular policies - you should never ship an
API without rate limiting because your customers or internal developers will
accidentally DoS your API; usually with a rogue useEffect call in React code.
What's a Policy?
Policies are modules that can intercept and transform an incoming request or outgoing response. Zuplo offers a wide range of policies built-in (including rate limiting) to save you time. You can check out the full list.
Zuplo offers a programmable approach to rate limiting that allows you to vary how rate limiting is applied for each customer, or request.s
In this example, we'll add a simple IP based rate limiter, but you should look into dynamic rate limiting to see the full power of the world's best rate limiter.
-
Link your Local Project
When developing locally with Zuplo, you can "link" your local project to your Zuplo project using the
zuplo linkcommand. This allows you to test your changes in a real environment.When you run the command you will be prompted to select your Zuplo account, project, and environment. You can pick any environment.
CodeAfter your project is linked, environment variables and other configuration from your Zuplo project will be available in your local development environment.
-
Start your Project
You can start your project using the following command:
CodeAfter your project is started, you can open the local route designer at http://localhost:9100.
-
Add the rate-limiting Policy
Open the local Route Designer by navigating to http://localhost:9100/. Select your route and click Add Policy on the incoming Request policies section.
http://localhost:9100/?path=routes.oas.json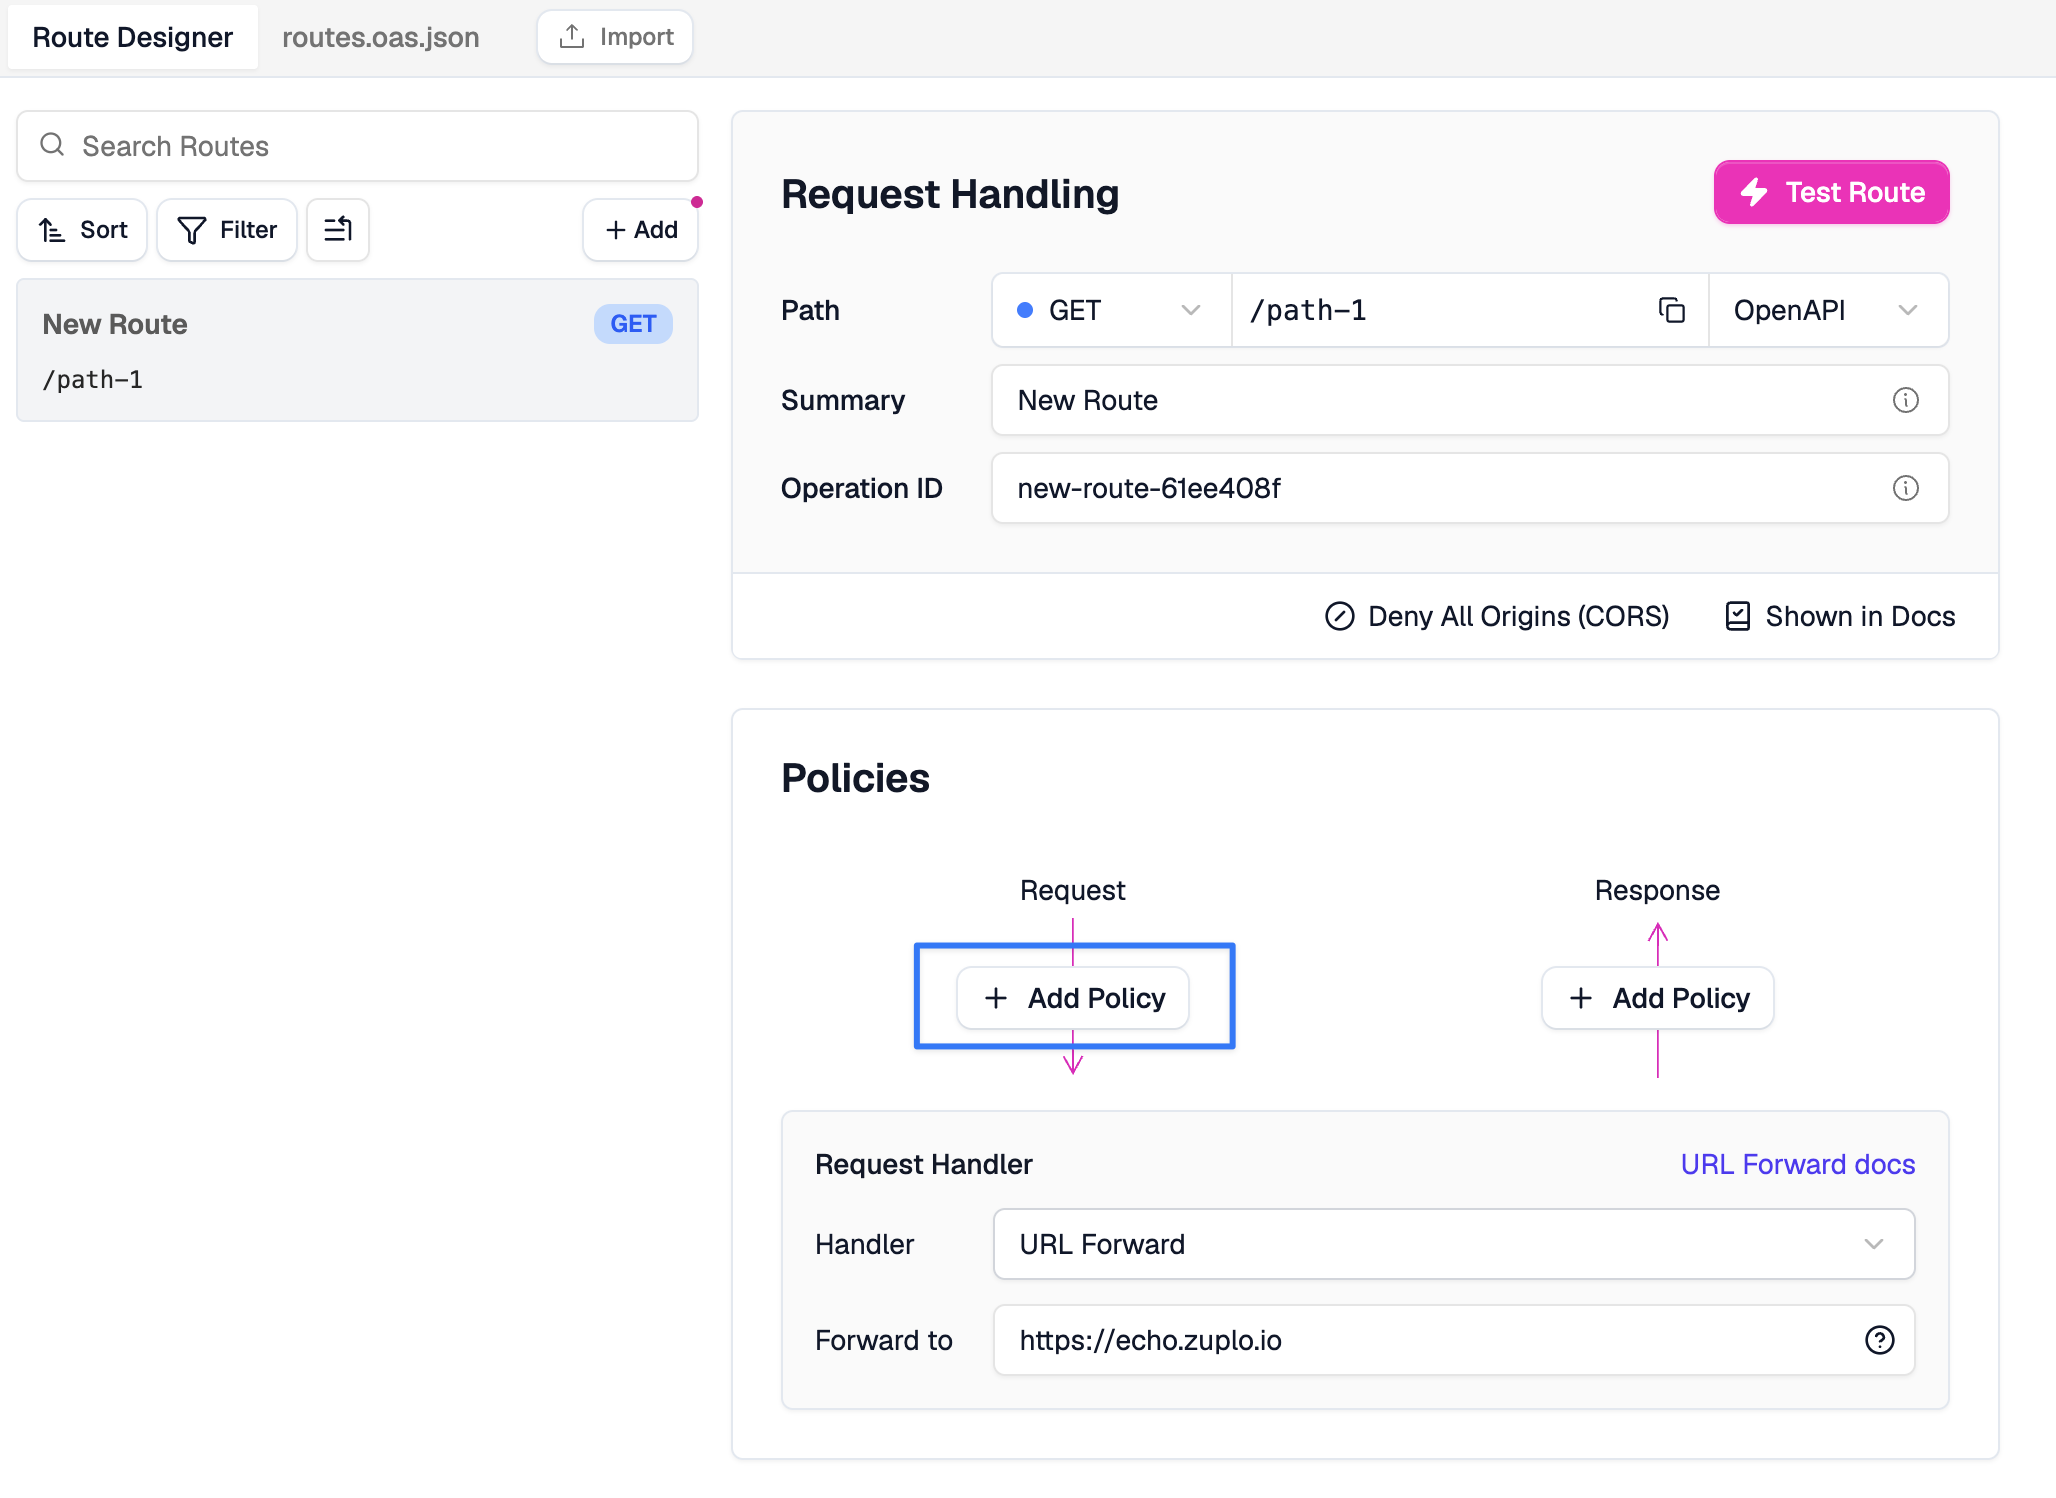
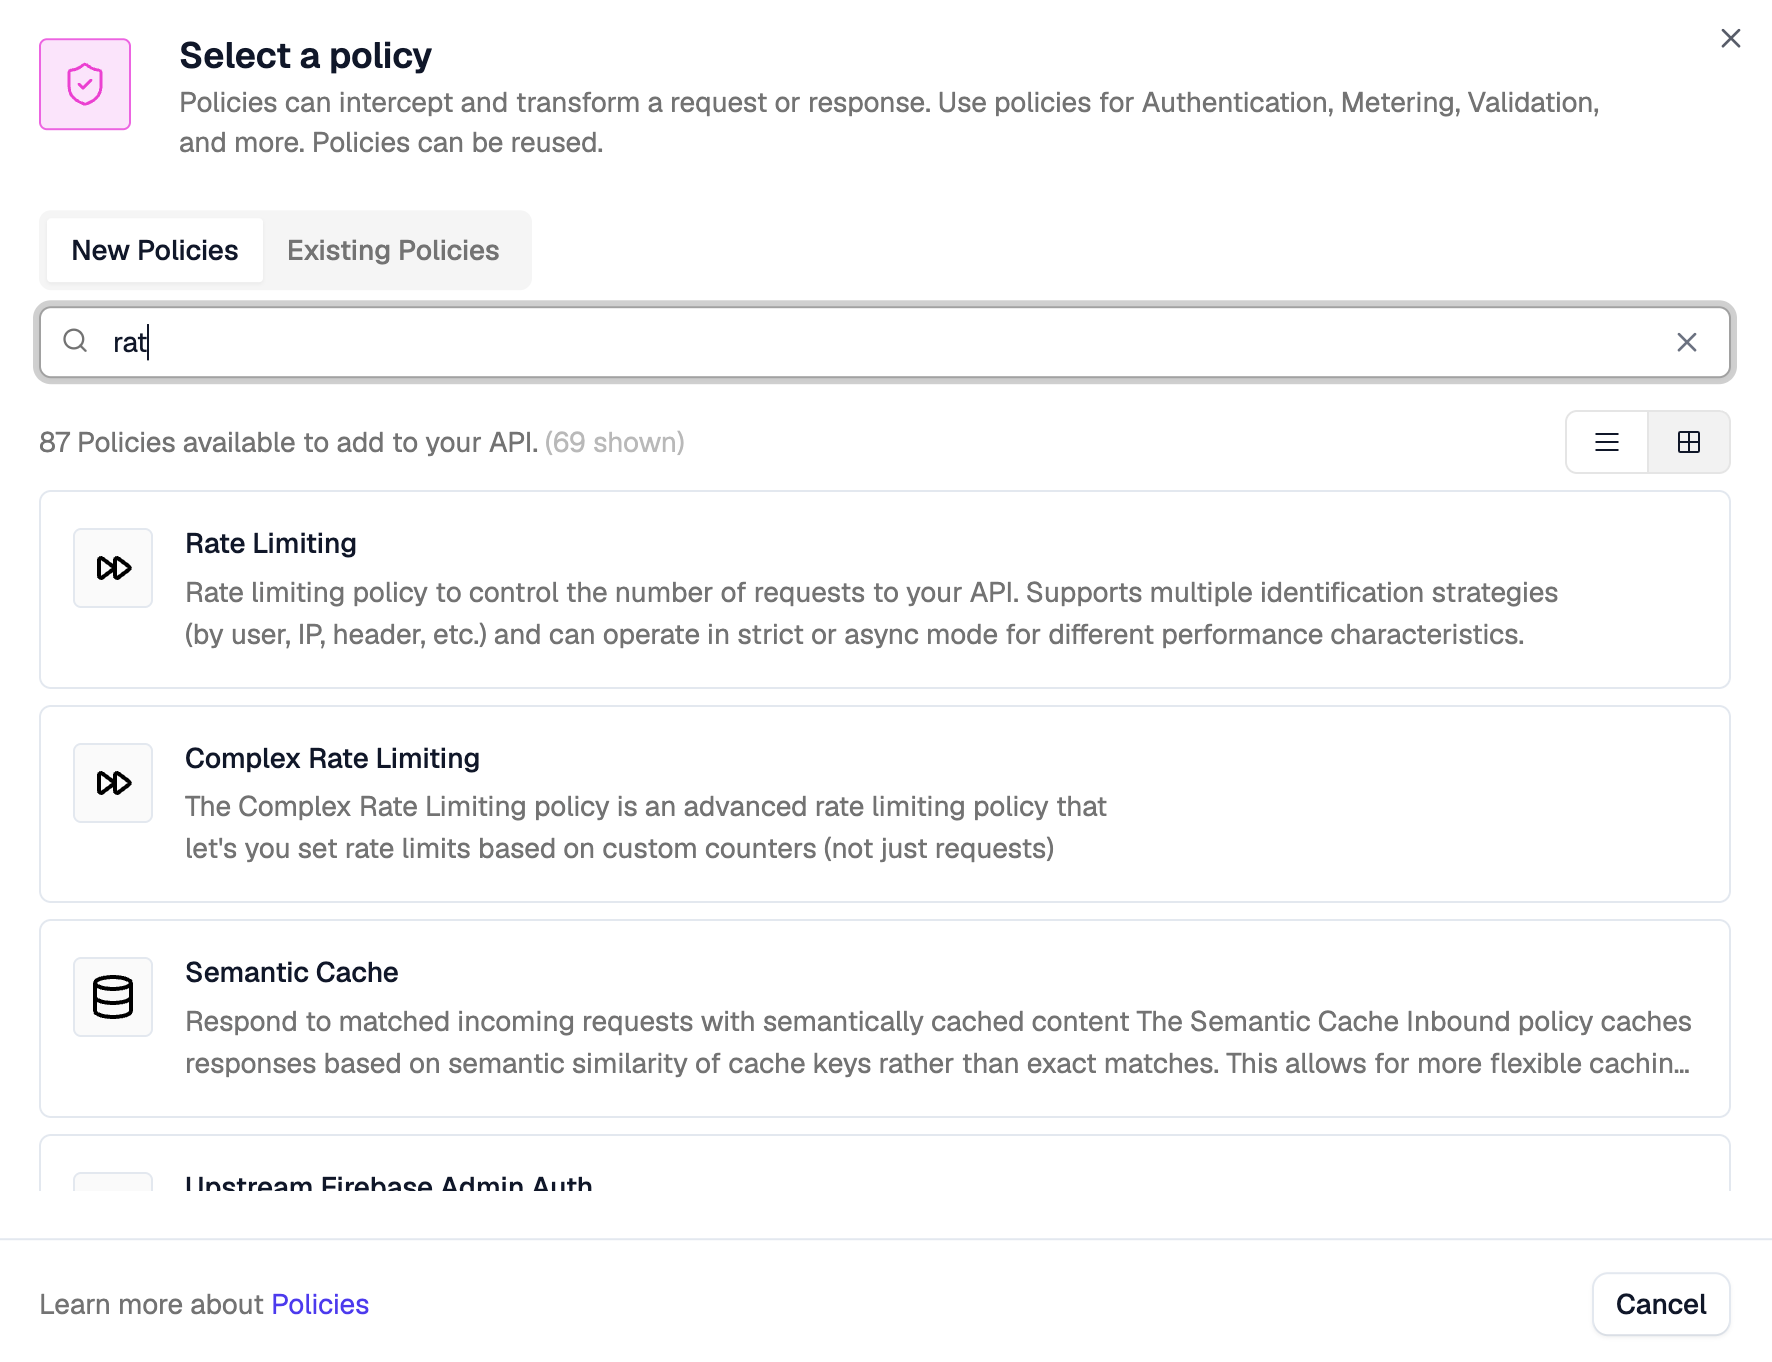
Search for the Rate Limiting policy (not the "Complex" one) and click it.
By default, the policy will rate limit based on the caller's IP address (as indicated by the
rateLimitByfield). It will allow 2 requests (requestsAllowed) every 1 minute (timeWindowMinutes). You can explore the rest of the policy's documentation and configuration in the right panel.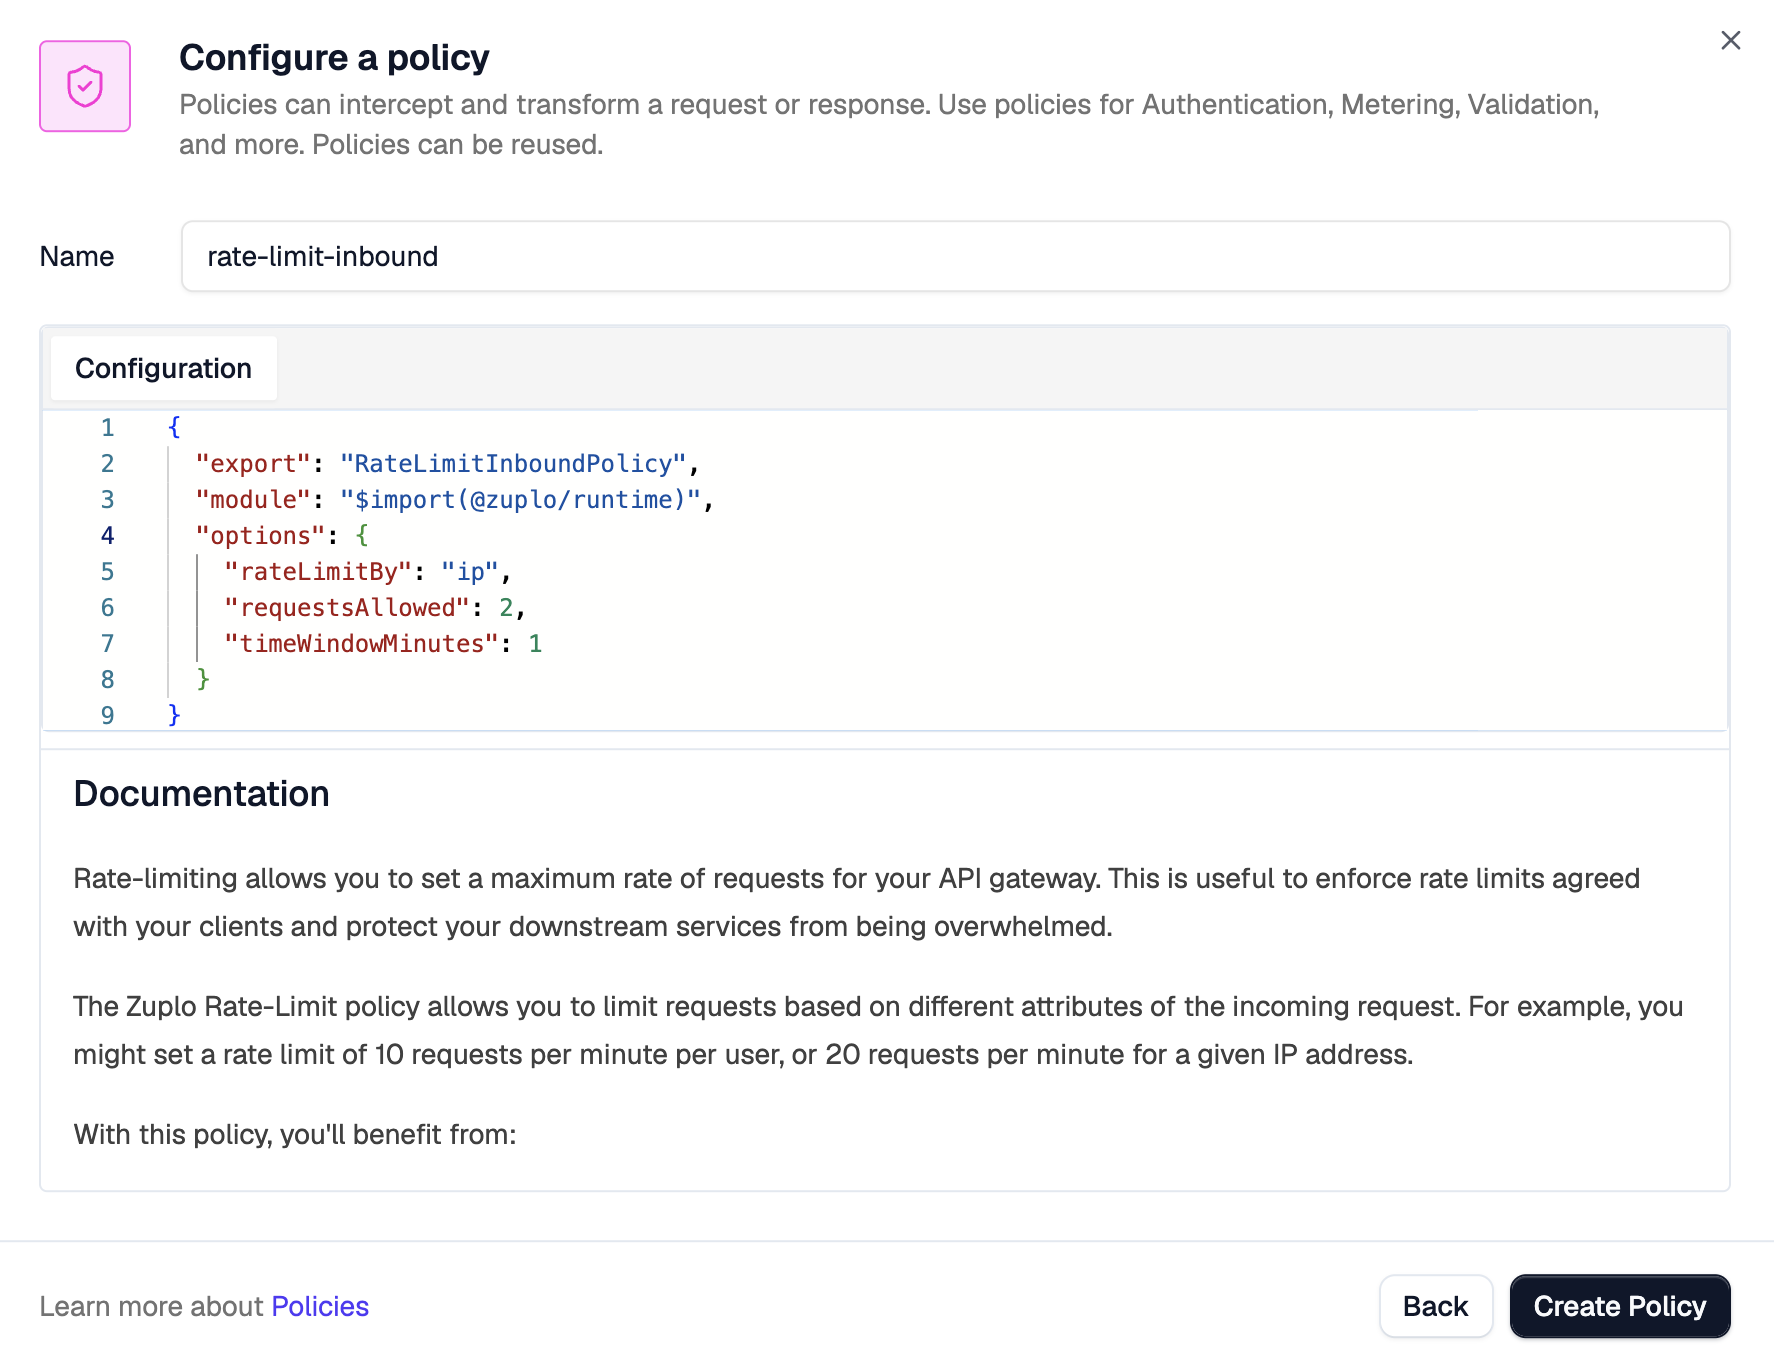
To apply the policy, click Create Policy. Then, save your changes to redeploy.
-
Testing your Policy
Now try firing some requests against your API. You should receive a 429 Too many requests on your 3rd request. You can use any API test tool you prefer, such as Postman, HTTPie, or curl.
CodeAfter you make the request 3 times you will see a response similar to:
CodeYour rate limiting policy is now intercepting excess requests, protecting your API.
NEXT Try Step 3 - Add API Key Authentication.